Reupholstering Seats: Peugeot Expert Camper Conversion
- Feb 27
- 2 min read
Welcome to the ninth instalment of our camper conversion series! When we removed the bulkhead from our 2020 Peugeot Expert at the start of our conversion, we were left with uncovered seatbacks – which didn't look great. So in this post, we'll be reupholstering them. You'll find a step-by-step guide along with helpful tips and tricks for your own project.
Tools Used:
Step One: Measuring the Seats
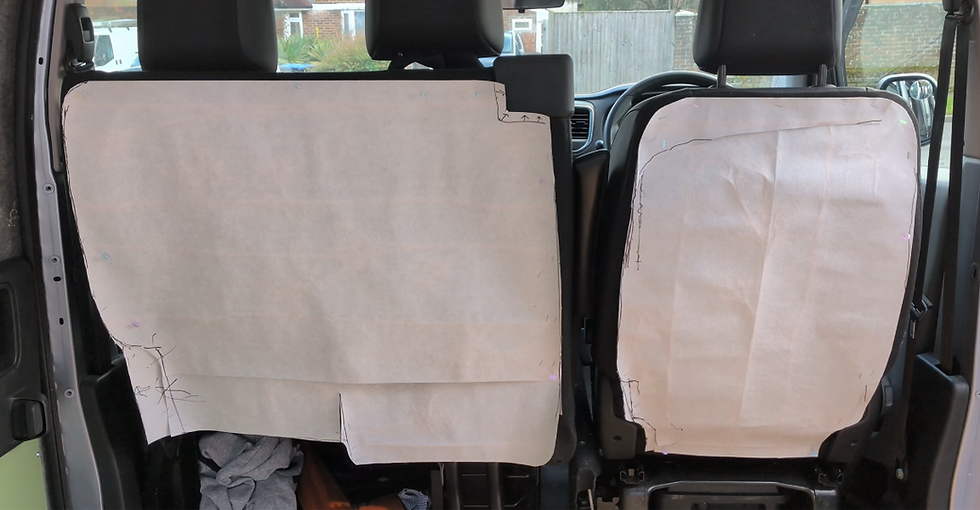
We started by pinning some spare wallpaper to the seats. Then, we cut it to shape to create the pattern we'd use for the fabric. If we cut too much of the paper away, we used pins to add it back where needed.
Step Two: Cutting the Fabric to Shape

I pinned the pattern to the fabric and used it as a guide while cutting it out.
Step Three: Installing Velcro
After looking at the passenger seat, I realised that there was wasn't much material to sew into on the lower sections, so I decided to use Velcro. I cut two strips of Velcro and used Gorilla Glue to hold them in place.
Tip: Glue takes a few hours to adhere to metal. Use tape to hold it in place while it dries, as it will need to be firm before moving on to the next step.
The next day, before we got started sewing, I glued the other side of the Velcro to the fabric after making sure it was in the right position – this took a lot less time to dry as it was on fabric.
Step Four: Sewing the Fabric
With both seat backs pinned in place, I sewed around the edges. Watch the video above to learn the stitch we used.
I worked in sections, using approximately 1 metre of thread each time to avoid unwanted knots. I sewed along the top of the passenger seats first, starting from the plastic seatbelt cover along to the top left corner, before ending the run stitch at the point the Velcro started.
The final stitch ended back at the plastic seatbelt cover. This was practical, as the fabric could be tucked under the cover, giving us more space to tie the final knot.
Tip: Make sure to leave plenty of thread to tie the knot at the end of each section and end in a place that will be covered later on.
On the driver's side, I ended the final stitch at the bottom of the seat, as it would be out of sight.
I'm happy with how this step of the project turned out. Even with no prior sewing experience, we were able to greatly improve the finish of the van.
What's Next?
The next step in the conversion will be building the bed and cupboards, and after that we'll be doing the electrics. Sign up to get notified when we post our next update, or alternatively subscribe to my YouTube channel.


Comments